Saturday, November 05, 2011

Another Visitor

Today I cut down the indigo and laid it out to dry in the sun. It was not quite hot enough to get it really dry. Sunday is forecast to have more sun and to be warmer so I will leave it out for another day to get it is dry as possible. The flower heads will then be cut off and bundled to hang to dry so the seeds will fall out. I am crossing my fingers that I have a nice crop of seeds! The indigo plot had a visitor that I had to ask to move out before I cut it.


Praying Mantis guarding the indigo. I think she looks like an alien from another planet.


Wednesday, November 02, 2011

The Indigo blossoms are starting to dry.
I promised pictures of the indigo's progress in my last post. I am so excited that I will get some seed this year. Last year the frost got my first crop of indigo before it went to seed. My husband has been wonderful about helping me get it covered at night and uncovered again in the mornings.

A closeup view of the drying flower heads shows the blossoms close up as they dry and the seed forms in the center.


I plucked off one of the dried flowers to see how far along the seeds have developed.


After rubbing off the dried husk, one tiny indigo seed emerges.

Tuesday, November 01, 2011

Indigo Seeds--coming soon!

After many days of covering and uncovering my indigo to keep the frost off, I can see the payoff coming. Some of the lovely blossoms have started to close up and dry. Inside, tiny seeds are forming. The honeybees are there to greet me in the morning. I know they are going to be disappointed when this source has dried up but it has been something I have been anxiously awaiting. I will not be able to separate it by color after it is dry. I will have to come up with a better plan for next year.My next post will have pictures to update the progress from blooms to seed.

Monday, October 17, 2011

Indigo and Butterflies

A Buckeye Butterfly enjoying the sunshine and indigo.


If you zoom in, you can see the butterfly sipping from the indigo.   


The white blossoms started out looking pink. It was not until they fully opened that I could really tell the difference.


Thursday, September 29, 2011

Indigo Blossoms

My indigo is sporting some dainty pink flowers now. The kojyoko variety has not bloomed out yet and is supposed to have white blossoms. I think I see some buds forming on them. I am worried about a hard frost we are expected to have soon so I will have to watch and cover them if needed.

The leaves and stems have taken on a reddish cast as the buds came out.

A tiny spider is a bonus in this picture. The buds are just shooting out and are still green.
The buds are tiny and arranged on sprays.
An overhead view shows the arching of the sprays of flowers.

Lots of blooms coming out.
I love this picture! My husband even said it was a good portrait of the indigo buds.

One dainty flower opening.

More flowers opening.


I have made this picture my screensaver on my computer. I love the pink flower
buds against the blue sky. Not my best photo, but it makes me happy.

Tuesday, September 27, 2011

Colorways Fall 2011

Truly exciting for me to be included in the new Colorways e-mag for Fall 2011. My good friend and fellow artist and art teacher Michelle Cox joined me in working on "In the Kitchen." We used commonly found kitchen items and cooking techniques to dye with. We also got to experience the beauty of the yellow that is saffron! Truly golden and glowing, saffron will brighten your day even if it only lasts a few seasons as it fades with exposure to light. Yes, we did use some dyes known to be fugitive, but you can dye it again in the same color or do something different. We used several different fibers and silk scarves for our dye experiments. Here is a sneak peek:

A lovely little dish of saffron.

If you click the link above you can get a better preview. It is an exciting edition with articles from Rowland Ricketts on his IndiGrowing Blue project and Elaine Lipson gives an overview of her trip to ISEND. The e-mag format developed by Interweave includes slide shows, pop out photos, videos, pdf files to print out as reference and great photos and articles. It really is eye candy for the fiber artist! The summer 2011 issue of Colorways (the premier issue) is fabulous as well.


Indigo Comparison II

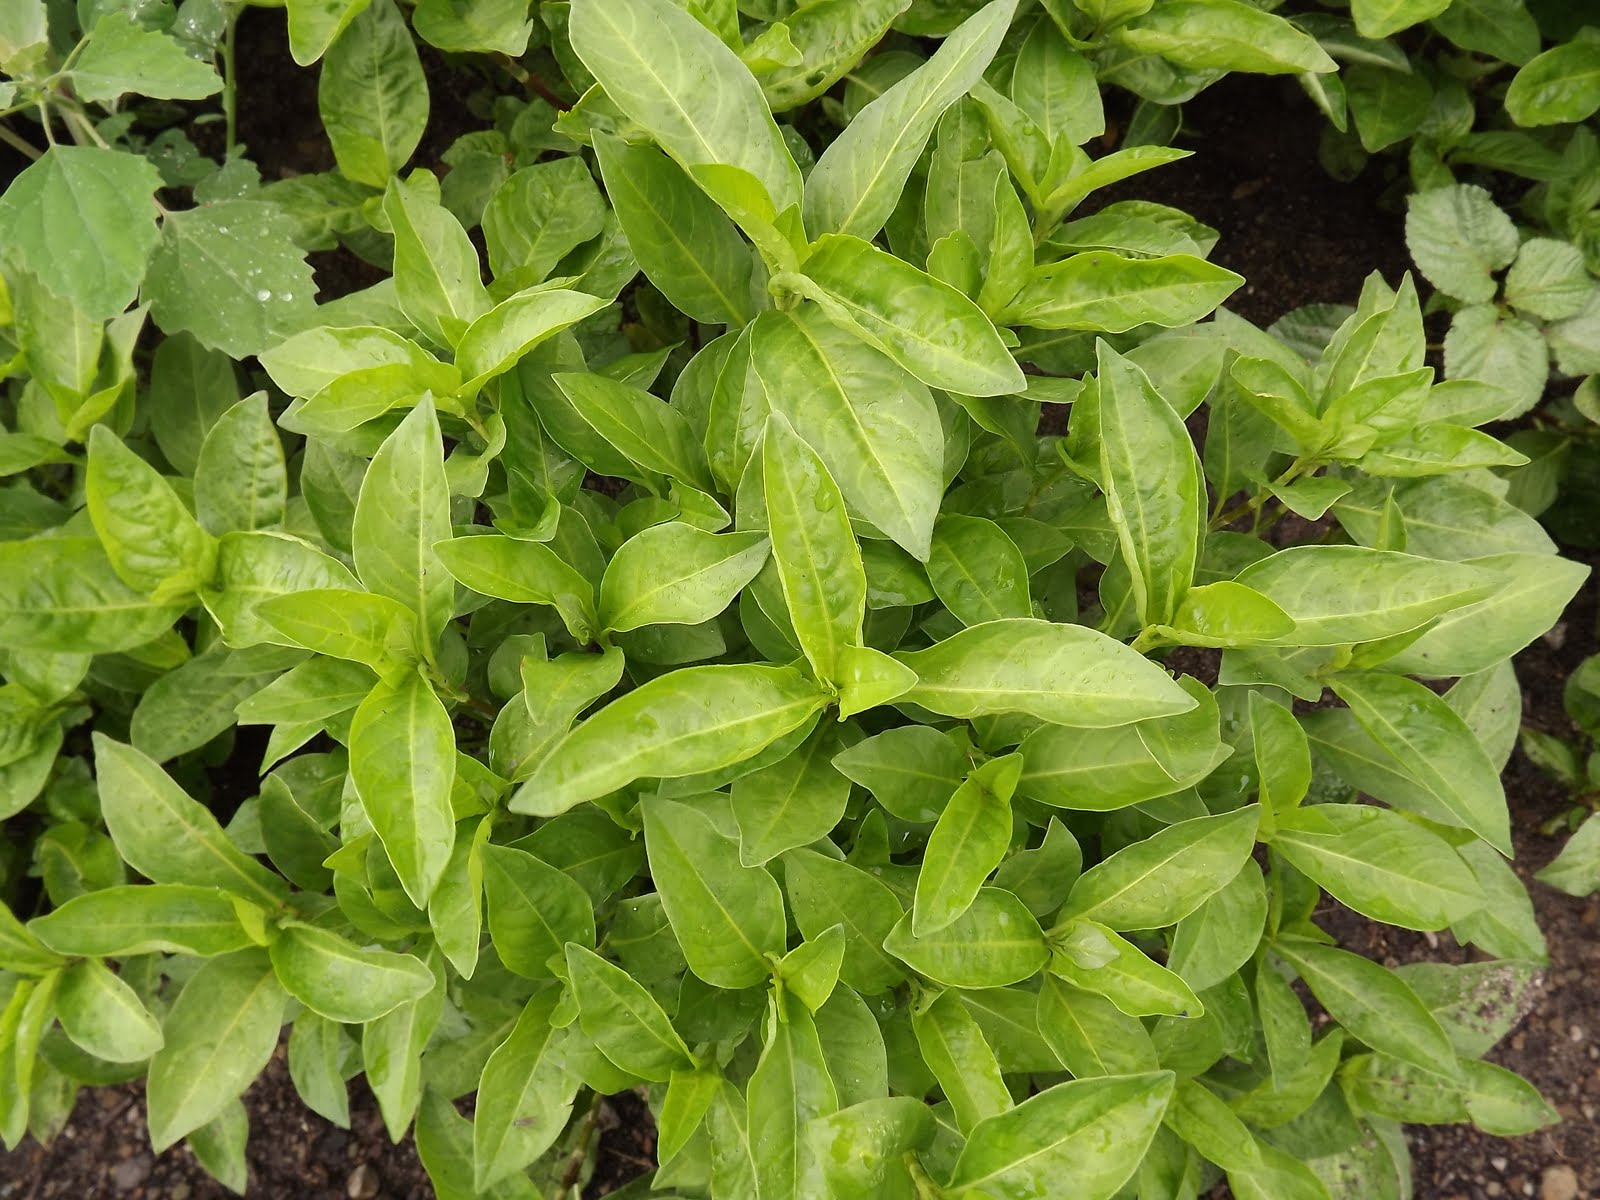
A comparison of two varieties of indigo. I know the one on the left is polygonum tinctorium. The one on the right seems to be slightly different but may still be polygonum tinctorium--just another variety.

To update, I have three varieties of indigo growing this year. Two types of polygonum tinctorium and a third I now believe was not identified correctly when I got the seeds. The third has thinner leaves that tend to curl and they seem to turn a darker blue when dried. The plants have gotten taller than the others after the same growth and have bloomed earlier than the others.

I removed a leaf from each of the plants in the picture above and slightly crushed them. The leaf on the left started to turn blue immediately and the one of the right only a little. The leaf on the left is much thinner and they have had a tendency to curl on the plants. The leaves are close in size as far as length and width go.


From left to right, the varieties are: the one I am unsure about, polygonum tincorium senbon, and polygonum tinctorium kojyoko. All were transplanted at the same time.

The unidentified stems approx 18" long, thick stems with reddish/brown cast. Leaves are thin and have a tendency to curl. Leaves are slightly olive in color. Larges leaves are approx 3-4" long and 2" wide at widest point.

Polygonum tinctoria  senbon. Stems are approx 18" long with a reddish cast. Leaves are bright green and approx 3-4" long and 2" wide at widest point.
Polygonum tinctoria kojyoko. Stems are approx 12-14" long and are green with some brown. Leaves are bright green and approx 2-3" long and 1 1/2" at widest point. This variety seems to grow a little more compactly.

Left to right, the unidentified variety, polygonum tinctoria senbon, polygonum tinctoria kojyoko leaves for a side by side comparison. 


Next I will compare the dried stems and leaves and then the blossoms and seeds. I am still working to confirm what variety of indigo I have in the third set of plants.

Sunday, August 21, 2011

Indigo Comparison

I finally have some time to update on my indigo from this summer! Even though life's event put me a little behind on my indigo, I am still on target for the goal I set for my indigo this year--a comparison of the plants. I have three varieties going. All though all are polygonum tinctorium, they are each a little different. For my project this summer, I used the seeds I had left from Companion Plants and two varieties I was able to purchase from the Indi Growing Blue project. I compared the two varieties of seeds in this post http://elephantbooty.blogspot.com/2011/04/looking-close-at-indigo-seeds.html Now to compare the growing plants:

The kojyoko variety will have white bloom and green stem.
The senbon variety will have pink blooms and stems with a reddish cast.
From Companion Plants, labeled Polygonum Tictorium, but not sure of the actual variety.


From the pictures above, you can see that the top two look very similar as far as the leaves go. I need to get a picture of the stems for my next post. The bottom picture shows how the leaves are darker and have a tendency to curl on the other variety. It is interesting for me to note that Companion Plants no longer carries Polygonum Tinctorium and has instead Indigofera Tinctoria. I am wondering if what they had  before was not labeled correctly or had not been indentified correctly.

In order to make sure I get some seeds from these plants, I am going to let one group from each row remain uncut. I will be able to harvest the leaves soon and I am devising a method for comparing the yields of each variety.

Monday, July 25, 2011

Arrowmont 2011

It takes some time to readjust to regular life after spending an intense week at Arrowmont. My friend and co-worker Debbi sums it up well over on her blog http://paperdollpost.blogspot.com/2011/07/what-letdown.html  Michelle Cox was also with us for the week. Three women going to "art camp" in one car seemed to be amazing to people. I have to give most of the credit for us not only fitting in one car, but for having room to spare to Debbi and Michelle.

We all worked hard during the week but had opportunities for fun. Karaoke night was a blast until I decided I would get up and sing. The monitor that displays the lyrics decided to go on the fritz. Poor Amy Winehouse's Rehab took a beating that night. Poor Amy Winehouse--so much talent and all wasted away.

I decided to take a break from fiber this summer. I have been to Arrowmont nine times and it was time to try out another type of class. I landed in the glass casting class totally clueless about glass. Everyone else had some kind of glass experience and all were very kind to answer my questions and offer suggestions.

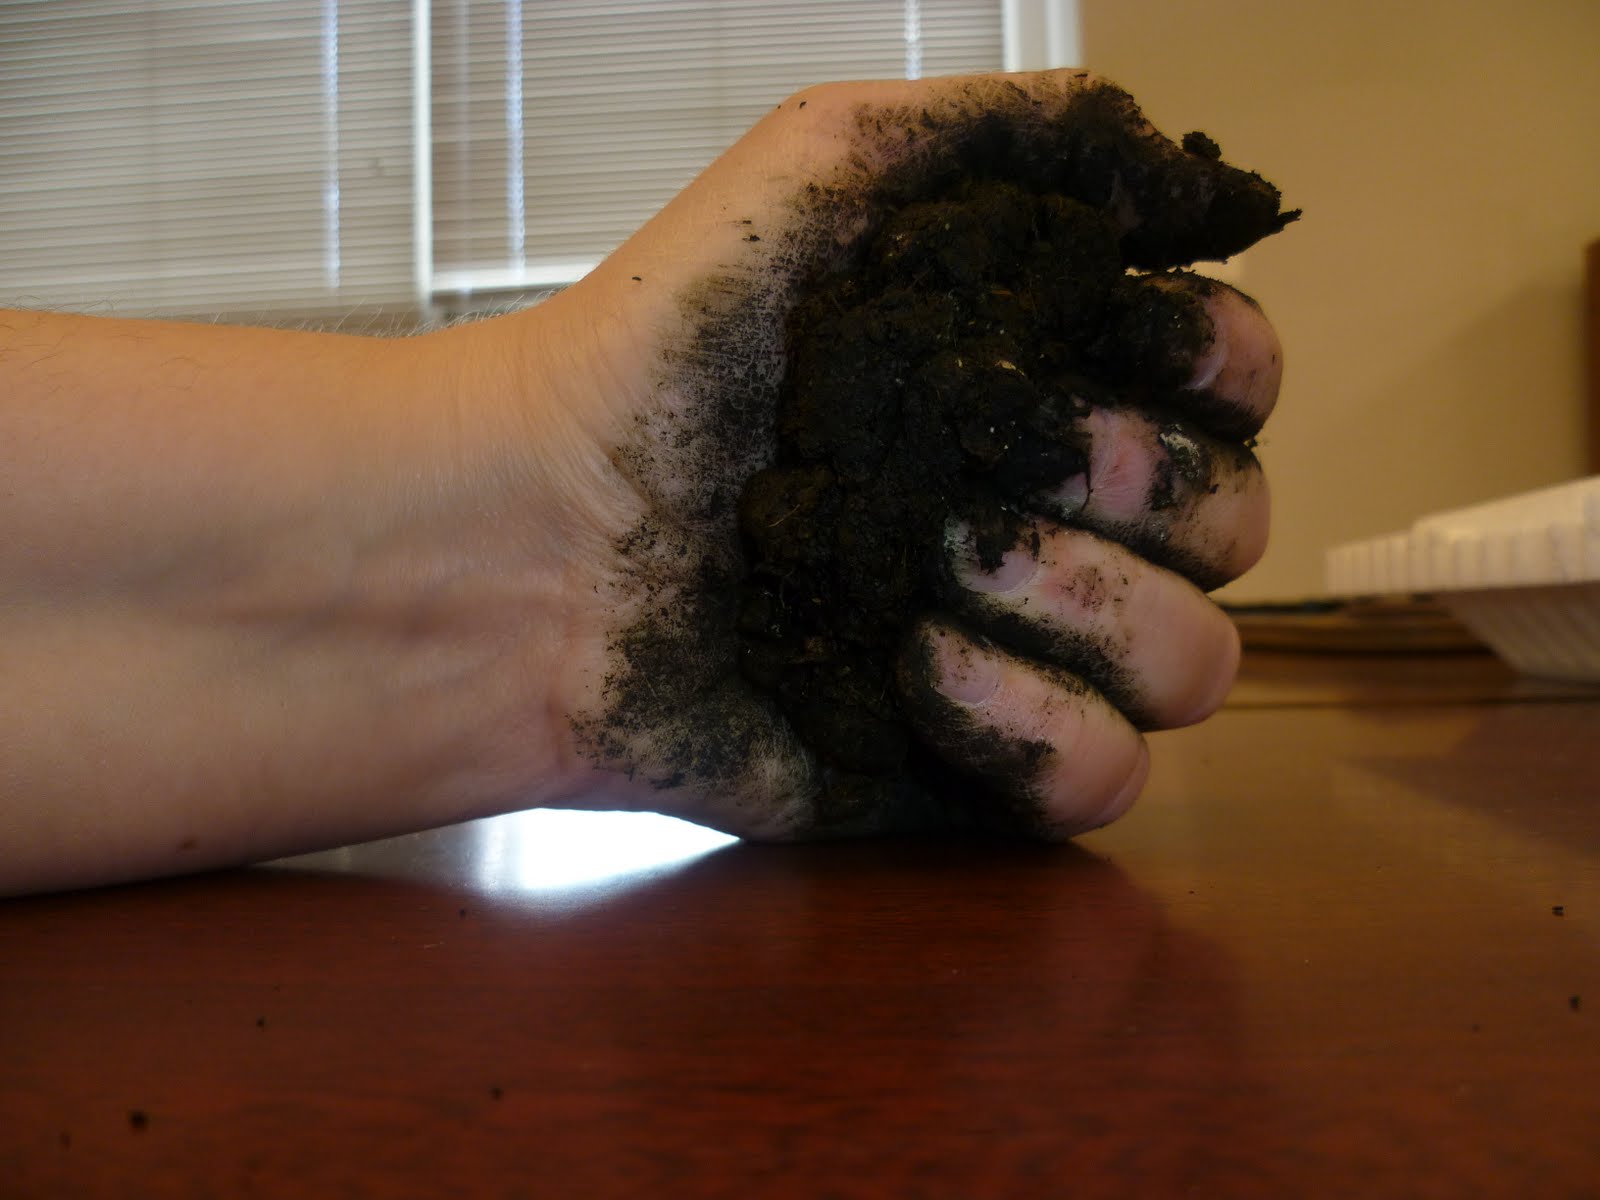
The weeks booty! Some are sand cast pieces, some were sand blasted to make them frosty. The bird head at the top was modeled in clay first; a plaster mold was made and then the clay dug out. The elephant head in the middle (blue swirls) was carved out of wax and then a plaster mold was made.  The wax is steamed out of the mold.


Here is another view of the elephant head showing the wax original and the cast piece side by side.


The blue swirls on the cast piece were created with the "pot melt" method. A flower pot with glass frit arranged in thirds was placed over the opening to the mold so the glass melted and swirled to fill it as it melted. The bottom was sanded on the lap sander to smooth it out. I think it will make a great paper weight!
My pattern bar after being sliced on the diamond saw. I was going to remelt these on another project but ran out of time.
I loved the textures in this plaster mold I made on a slab of clay. I really did not want to ruin it by casting the glass in it. I went ahead and did, but I was not happy with the results. It is in the lower left of the picture at the top.

I think I love the plaster above because the textures remind me of my beloved textiles. It was good to step away from them and work 3D in another form, but I still missed my textiles.

Saturday, July 09, 2011

Stitch Fall 2011

Stitch magazine's Fall 2011 issue is out and it is fantastic. I want to make so many of the projects in this one! I did make one already--the Hardware Toiletry Kit.

The Barbasol is a nice touch isn't it?
 The messenger bag on the cover is awesome. I am going to have to carve out some sewing time for me.

Thursday, June 30, 2011

Indiana Weather

I have gotten behind on posting here. Life is keeping me very busy at the moment. I find it hard to document my work when I get this busy. I am so involved in just doing the work I lose myself to it.

My indigo is a little behind schedule due to the Indiana weather we have been having. I am thinking I may be lucky to get one harvest this year before letting it go to seed. I have three varieties going and I hope to be able to compare the colors from each.

I have not started my fermented vat yet either. I am really excited about it but my husband is going to have to treat the backyard and porch area for ticks before I can spend much time there. Ticks seem to love me and I am fighting off my second round of Lymes. Hopefully next week will be productive on the indigo front and I will get pictures posted to update the indigo's progress.

Friday, May 27, 2011

Top Ten

One of my designs on Spoonflower made the Top Ten in the Folk Tales contest. I have been playing around with the logo for Elephant Booty Studios for a few years now. It started out as a sharpie drawing for a silkscreen class at Arrowmont. We had to create a repeat design to make a silkscreen to print with thickened procion dye. As I kept repeating the design on my fabric, we noticed it got a bit "wonky." At the time, the instructor and I thought it was a registration problem from the padding on the table being uneven on the sides. By the time I got all the way across the 3 yards of fabric I was printing it was off by a half inch.
Once I got home and started playing with the design in Photoshop, I realized that the asymetry of the design and what looked balanced to my brain was off by just enough to keep adding up in the repeat. I have been learning a lot of hints and tricks for Photoshop from my techie brothers and from fellow Spoonflower designers on the Flickr group. I have been editing and fine tuning the repeat for a while now and also trying out different colors and patterns for coordinating fabrics.  I am in love with the "set pattern" fill in Photoshop for making more complex designs based on a set of coordinating motifs. I am pretty happy with the set of coordinated fabrics I have now and I am waiting for my swatches to arrive as a final check before putting the set up for sale.

My last set of swatches includes my Ele Boo Blue Ganesh design
that made the top ten of the Folk Tales contest at Spoonflower.

I am really happy with how bright the colors printed on the swatch of my Ele Boo Blue Ganesh.

The above is a closeup of the enlarged version of my design.  I wanted to see how
bad the pixelization would be and it really is better than I had thought.  I am thinking I can
order more of this and make new curtains for my studio. The colors on this one are a slightly faded
version.  Again, I am still doing quite a bit of experimenting as I learn the ins and outs of Spoonflower.

I also experimented with making some of the designs more intense in color.  In this design,
I made use of the fill pattern tool in Photoshop.  I designed a set of motifs to coordinate and then
designed a set of shapes to experiments with layering.


I think this is looking really washed out because of my camera, but you can still see some of the pattern layering I am working on.

I also have been working with my Ele Boo design motifs in magenta, white and black.

Wednesday, May 11, 2011

Indigo update

My seedlings are making good progress. The first set of seedlings is almost ready to transplant. I hope we get a weekend with clear weather so I can get the planting bed ready for them.


My first set of seedlings need to be thinned out to get them ready for transplanting.


Senbon--not as many came up as the other variety.


Kojyoko--good success with germination for these.

Monday, May 09, 2011

Indigo Seedlings

My senbon variety of indigo---with the pink blooms and stems with a reddish cast--has germinated.

The kojyoko variety with the white blooms and green stems has also come up!

Wednesday, May 04, 2011

Indigo Cakes


My indigo compost was down to about two inches in depth and had turned a blackish greenish blue. It now had the feel and consistency of a good clay soil.


I scooped out a handful and kneaded it in my hands and then rolled it into balls. The balls were flattened and formed into squared off cakes. I thrilled as I watched the outside of the cakes start to turn blue as they dried on the tray in the sun.


I know it does not look like much and I am not sure I have created a usable dye yet. Again I am having to be patient and wait and see. I was lucky enough to finally get a copy of Dorothy Miller's book "Indigo--From Seed to Dye." Reading about her learning process has been very helpful. I am trying to decide which of the recipes for a vat to follow as she offers several in her book.


Monday, April 25, 2011

Indigo compost update

I opened up the indigo compost to give it a good stir and it has gotten very dark in color and was compacting down nicely now. I am a bit worried about it being too wet now that we are having so much rain. The humidity is way up so I may just open it up and stir it more often to add more oxygen and keep it from being too damp. It really is a balancing act.


I also opened up the jars of fermenting indigo to check on them. No mold but I think the smell and how slimy the liquid was is probably not a good thing. I decided to pour off the water which was brown and added fresh and stirred it up quite a bit. I am planning to let the green bits settle again and pour off the water and repeat the process. I am thinking about what I might need to add to change the chemistry in addition to adding oxygen. I am thinking ash, lime or something acidic like a fruit juice?

Friday, April 22, 2011

Looking close at indigo seeds

Indigo does not come from just one plant. Japanese indigo also has several varieties as I am finding out.


The packages of indigo from Rowland Ricketts are nicely labeled indicating the name of the variety and what color blooms they will have. It also states the tint the stems will have. The kojyoko variety will have white bloom and green stems while the senbon variety will have pink blooms and stems with a reddish cast. I plan to separate these in my garden so I can track the differences in them this year. I want to look at yield of dried leaf and color produced from the dried leaf.

The seeds are slightly different in appearance as well as being different from the seeds I got last year from http://www.companionplants.com/  The seeds from Companion plants are flatter and smaller and dark brown in color.  I started those last week and they are now sprouting.
Indigo sprouts
leaning toward the light
You can see the shells of the seeds
clinging to the cotyledons.
The white fuzz is the thin
hair-like roots forming.


Above are the seeds from the new packages. On the left in each picture is a seed still in the husk. On the right is the actual seed. The kojyoko seed is darker and smoother than the senbon. Both the kojyoko and senbon seem to have three sides instead of the two sided flat seeds from Companion Plants which is labeled as indigofera tinctoria which is part of the pea family.  The Japanese variety--polygonum tinctorium is part of the buckwheat family. I will be starting the flats of these seeds this next week.