Showing posts with label Ricketts Indigo. Show all posts

Friday, April 22, 2011

Looking close at indigo seeds

Indigo does not come from just one plant. Japanese indigo also has several varieties as I am finding out.


The packages of indigo from Rowland Ricketts are nicely labeled indicating the name of the variety and what color blooms they will have. It also states the tint the stems will have. The kojyoko variety will have white bloom and green stems while the senbon variety will have pink blooms and stems with a reddish cast. I plan to separate these in my garden so I can track the differences in them this year. I want to look at yield of dried leaf and color produced from the dried leaf.

The seeds are slightly different in appearance as well as being different from the seeds I got last year from http://www.companionplants.com/  The seeds from Companion plants are flatter and smaller and dark brown in color.  I started those last week and they are now sprouting.
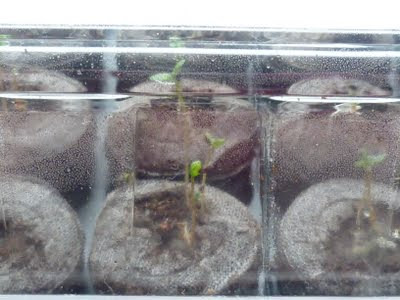
Indigo sprouts
leaning toward the light
You can see the shells of the seeds
clinging to the cotyledons.
The white fuzz is the thin
hair-like roots forming.


Above are the seeds from the new packages. On the left in each picture is a seed still in the husk. On the right is the actual seed. The kojyoko seed is darker and smoother than the senbon. Both the kojyoko and senbon seem to have three sides instead of the two sided flat seeds from Companion Plants which is labeled as indigofera tinctoria which is part of the pea family.  The Japanese variety--polygonum tinctorium is part of the buckwheat family. I will be starting the flats of these seeds this next week.

Thursday, April 21, 2011

Indigo seeds have arrived

I now have my indigo seed from Rowland and I am really excited about getting it started. I was sharing my plans with my students and they think I have gone a bit nutty. They don't understand why I want to do my own experiments with the process instead of just looking up what someone else has done on the internet. I have look at other sites, other books, taken classes and listened to the wisdom of the instructors, but nothing replaces experiencing something for yourself.  It is the difference between reading about chocolate and actually eating it, between falling in love for the first time and having sometime tell you about it. It is just not the same as experiencing it and learning as you go along. My students are so impatient with the doing of things, the actual making of things. They do not value or honor the process and it shows up in their work. I hope as they mature, they will remember what I have tried to teach them about this.

Rowland was kind enough to send one of the promo cards
from one of his shows with a little advice!

Wednesday, March 30, 2011

Patience

I have learned that with indigo, you must have patience. Or perhaps it is about flowing with the seasons?  I really don't think our western culture encourages that. We want it now--right now! I have had two large jars of leaves fermenting since September. The indigo looks to be settling in them now.  I am going to go ahead and process one of the jars next week to see if it is indeed ready. If not, I have my backup jar.  Pics and info on that next week.


In the meantime, I have started composting my dried leaves. I had two varieties of indigo growing. Polygonum tinctorum from Companion Plants and seedlings from Rowland Ricketts IndiGrowingBlue project. Had I been planning better, I would have composted these separately to test out the colors. The dried indigo leaves were different in color and texture. The plants I grew from seed produced a dried leaf that was both more grey in color and crumbled finer. The plants from Rowland (which were started with his seed from Japan) stayed bluer and crumbled in bigger pieces and was more leathery instead of dusty.  The smell of the crumbled dried indigo is very earthy.


To compost the indigo I am using a styrofoam cooler. My small amount of indigo (three gallon size bags) just fits inside the cooler. Hopefully as the indigo starts to break down, the styrofoam will help it maintain the heat needed for composting. I have placed it in a sunny window in my school room with the lid weighted down.
I sprinkled in layers of the dried indigo and misted it with hot water from a spray bottle in between layers.  After a few layers I stirred it up with my hands and then repeated the process until I had used all of the dried indigo. The compost was covered with a few layers of muslin to help hold in the moisture. Every few days it is checked for moisture and turned. Water is added as needed.  I am hoping as our weather gets warmer and there is more sun, the process will speed up.


The first layer of dried indigo!

Adding water and mixing after yet another layer was added.

The top layers consisted of the indigo I started from seed. It is grayer in color and the texture is finer. 

More mixing!  The smell was fabulous--so earthy and kind of pungent.
A few layers of muslin help hold the moisture in.

Wednesday, August 25, 2010

Fresh Leaf Indigo Dyeing

As part of the IndiGrowingBlue project, Rowland Ricketts teaches participants how to dye with fresh indigo leaves.  The fresh indigo dye creates a beautiful turquoise color on silk and silk/wool.  The color reminds me of the water in Hawaii and can range from the pale greenish blue to the deeper, intense turquoise.  The range of color can be due to the concentration of the dye in the leaves or the concentration of leaves used in the preparation of the dye.  The prepared dye has to be used quickly as it will oxidize with the water used to prepare it.

Tuesday, August 24, 2010

Indigo Harvesting

My blog has been neglected again.  It has been a busy summer and now it is back to teaching.  I have been following with great interest http://www.indigrowingblue.com/ .  I am lucky enough to live close enough to have participated this summer.  Rowland Ricketts began this project to not only educate people about indigo, but to let them participate in the process.  I have been posting pictures to  the face book page for the IndiGrowingBlue Group, as have other particpants.


Transplanting happened at the end of May.  We were called to the field by banners dyed with indigo using a traditional paste resist technique from Japan.  The large pieces are typical of Rowland's work.  The banners were hung on bamboo poles that turned the banners into the wind and made a lovely creaking noise as they turned.  Rowland shared the secret of getting the indigo plants to grow stronger and bushier.  The transplanting is an important step. 


The first harvest was back in July when our temperatures were in the 90's and the humidity was pushing the heat index up past 100 degrees. 

The indigo is cut, hauled to tarps and spread out to dry in the sun.  Depending on the weather, the indigo may take one to two days to dry.  After drying, the indigo is winnowed to separate the leaves and stems.  The dried leaves are bagged and stored until they will be composted.

Pictures from teh second harvest and more about winnowing will be in my next post as I get my blog back up to date.Indi

Monday, August 03, 2009

Indigo Harvest Pics--long post

Fresh Indigo Ready for Harvesting


Rowland Ricketts cuts the indigo close to the ground. New shoots are sprouting up at the base of the plants for the second harvest--or the plant may be allowed to go to seed for next year's planting.

A scythe is used to cut the indigo. The scythe has a serrated blade to cut through the stems.

Volunteers helping with the first Indiana harvest for Rickett's Indigo carry bundles of cut indigo to the area where they will be laid out to dry in the sun.

Rowland spreads out cut indigo to dry in the sun.

The leaves turn dark blue as they begin to dry.

Drying indigo.

Indigo drying in the Indiana sun.
The leaves dry and turn quicker than the thick stems.

The dried indigo is put into a pile for winnowing--separating the stems from the leaves. The winnowing is done by stomping on the indigo pile to crush the leaves off of the stems.

After stomping, the stems are removed from the blue indigo.

The dried indigo is gathered and stored in bags until it can be composted.
To learn more about the process Rowland and Chinami Ricketts follow, please visit their website.
Rowland and Chinami are very generous in sharing their knowledge with others as well as being some of the nicest people you will ever meet. It was really a privilege to visit their farm and help with the indigo harvest. I will post some video clips as soon as I get those edited.

Winnowing the indigo

Winnowing the indigo was actually fun. After the indigo dries in the sun, it is gathered up in a pile and then stomped on--barefoot or shoes. The stomping crumbles the dried leaves off of the stems. The stems are separated from the dried indigo and the dried indigo gets stored in bags. Later the indigo will have to be composted to prepare it for the vat. I got some great pictures and video to post as soon as I get time to do a little editing. The sunlight was pretty bright and I may need to correct for that in my pics.

Saturday, August 01, 2009

Indigo burn

No, we did not burn any indigo--I am referring to the hint of sunburn I got during the indigo harvesting today. Rowland gave us a lesson on how to use the scythes to cut the plants, proper height for cutting to allow for the second growth, and how to lay out the indigo to dry in the sun. And Chinami was our charming host for lunch. It was fun to be with other artists from a variety of backgrounds to do something to help a fellow artist. I did get to take some photos and video but need to do some editing due to strong sunlight washing things out a bit. Tomorrow is the winnowing and I will work on getting more details and pics and video posted. I am thinking of doing a small planting bed of indigo to try now. The color range from the natural vat are so much better.